

Welcome to the world of composting for beginners, where turning kitchen scraps and yard waste into gold for your garden isn’t just a myth—it's a reality.
Composting is an age-old method that enriches the soil, supports the environment, and reduces waste, all at once. Whether you're a seasoned gardener or just starting to explore your green thumb, understanding the basics of composting can revolutionize the way you view waste and gardening.
Let’s embark on this journey together, learning how simple changes in our daily habits can contribute significantly to our gardens and our planet
What is Composting?
Composting is a natural process of recycling organic matter, such as leaves, vegetable scraps, and garden clippings, into a rich soil amendment known as compost.
It's a cornerstone practice in sustainable gardening, providing a fantastic way for beginners to contribute to a healthier environment while improving their garden's vitality. Think of it as creating a powerhouse meal for your garden. By managing this natural decomposition process, you're actively turning what might be considered waste into valuable, life-giving food for your plants.
How Composting Works
This cycle involves several steps, each crucial for converting organic material into compost. Microorganisms, including bacteria and fungi, along with insects and worms, play a key role in digesting the organic matter.
The process not only recycles waste but also produces a valuable product for gardening and agriculture. Here's how it happens:
- Collection: Gather green (nitrogen-rich) and brown (carbon-rich) organic materials.
- Mixing: Combine these materials in a compost bin or pile, maintaining a balanced mix for optimal decomposition.
- Decomposition: Microorganisms start breaking down the material, aided by insects and worms, which accelerates the process.
- Heating: The pile heats up due to microbial activity, indicating effective decomposition.
- Curing: After the active composting phase, the material cools down and continues to decompose at a slower pace until it stabilizes.
- Maturation: The compost matures into a dark, crumbly substance that enriches soil and retains moisture.
Achieving the right balance and providing an ideal environment for microorganisms are essential for efficient compost production. This process not only recycles waste but also turns it into a valuable resource for enhancing soil health and supporting plant growth.
Types of Composting
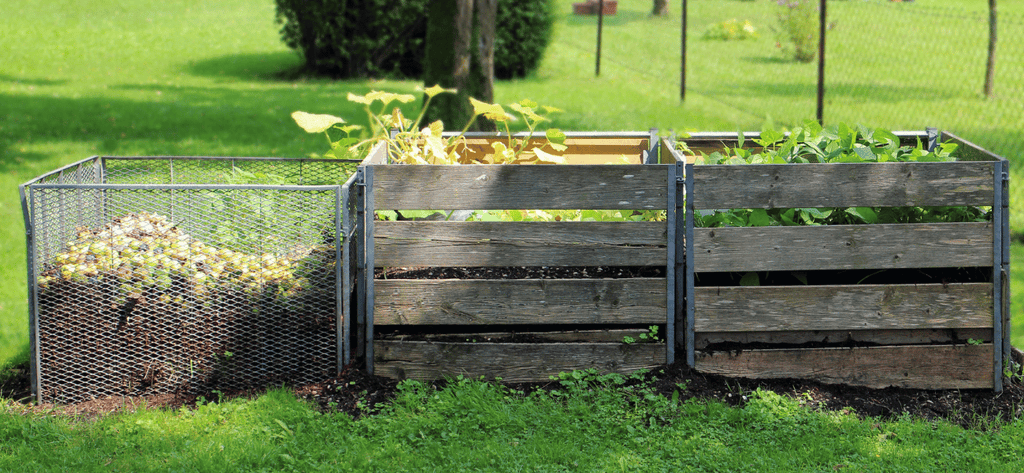
Backyard Composting
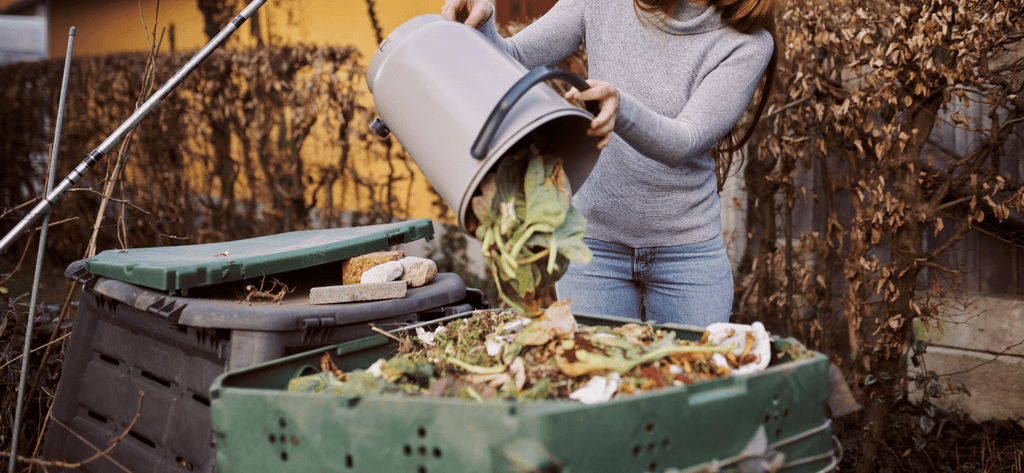
Backyard composting is a straightforward and rewarding way to recycle your kitchen scraps and yard waste into valuable organic matter, right in your own outdoor space. Starting a compost pile in your backyard involves selecting a suitable spot, gathering green and brown materials, and maintaining the right balance of air and moisture. Backyard composting is accessible to everyone, making it an essential practice for eco-conscious gardeners.
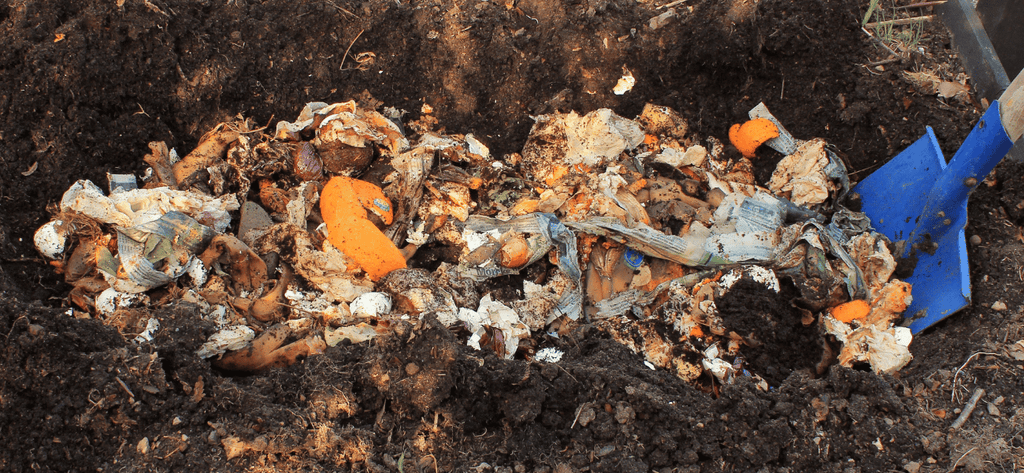
Trench Composting
This technique involves digging a trench directly in your garden, burying organic waste, and letting nature do the rest. Unique for its simplicity and the minimal space it requires, trench composting works directly within the garden bed, slowly releasing nutrients into the soil as the materials decompose underground. Trench composting also keeps the composting process out of sight, making it an ideal solution for those with limited space or who prefer a tidier garden appearance.
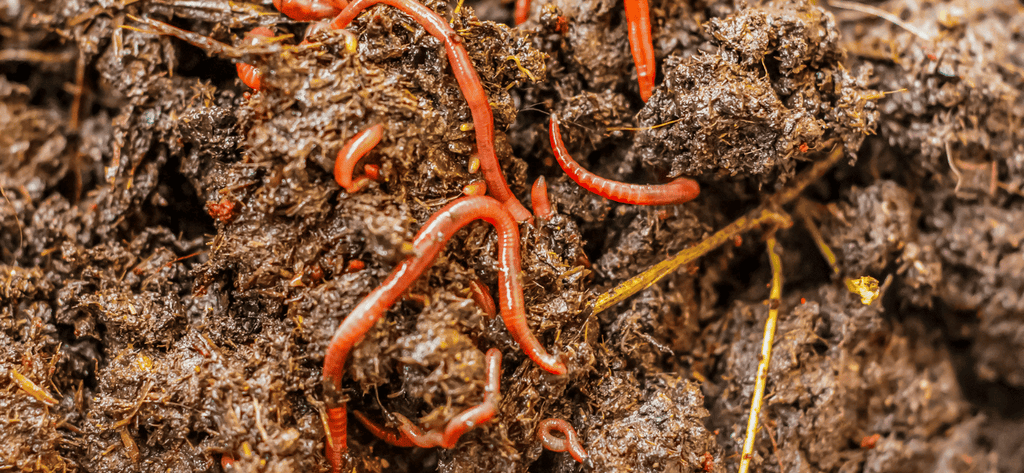
Vermicomposting (Worm Composting)
Vermicomposting, or worm composting, transforms organic waste into nutrient-rich compost with the help of red wiggler worms. This method is unique because it can be done indoors or outdoors, making it versatile for any living situation. Unlike traditional composting methods that rely on bacterial breakdown, vermicomposting is faster, thanks to the worms' ability to consume and break down waste efficiently.
It produces both solid compost and a liquid "worm tea," both of which are excellent for plant health. Ideal for small-scale gardeners or those looking to compost kitchen scraps without a yard, vermicomposting is an odorless, space-efficient method that enriches soil while reducing household waste.
Bokashi Fermentation
Bokashi composting stands out as a unique, fast-track composting method that ferments organic waste, including meat and dairy, which traditional composting cannot handle. Utilizing an anaerobic process, Bokashi composting employs a specific blend of microorganisms to break down waste in sealed containers, producing a nutrient-rich end product.
This method is remarkably efficient, transforming scraps into compost in just a few weeks, and it's ideal for indoor use, requiring minimal space. The resulting pre-compost can then be buried in soil to finish the process, enriching the earth with beneficial nutrients. Bokashi's ability to handle a wide variety of waste types and its compact, odor-controlled process make it a distinctive choice for eco-conscious individuals looking to reduce their environmental footprint.
Why Compost? Benefits of Composting
Composting offers several benefits, not just for your garden, but for the environment as a whole.
Reduces Waste
By turning your kitchen scraps, yard debris, and even paper waste into compost, you directly contribute to a significant reduction in the amount of trash sent to landfills. This is vital because organic waste in landfills decomposes anaerobically (without oxygen), producing methane—a potent greenhouse gas contributing to climate change.
Composting, on the other hand, is an aerobic process (with oxygen) that doesn’t release methane, making it a much greener option. Furthermore, by composting at home, you are effectively converting waste into a resource. This not only diminishes the need for chemical fertilizers, which have their environmental drawbacks, but also fosters a more sustainable cycle of nutrients, returning them back to the soil from whence they came.
Improves Soil Health
Composting enhances soil health, enriching it with organic matter for improved water retention and nutrient availability. Beneficial microorganisms thrive in this environment, breaking down organic material to nourish plants naturally.
Additionally, composting reduces the need for chemical fertilizers, promoting a balanced pH and reducing environmental harm. As a result, plants grow stronger, more resistant to pests and diseases, fostering a sustainable garden ecosystem.
In essence, composting transforms waste into a valuable resource, benefiting both plants and the environment.
Enhances Plant Growth
This natural process transforms organic waste into a potent, nutrient-rich amendment that plants absolutely love. Compost supplies a variety of essential nutrients, including nitrogen, phosphorus, and potassium, which are critical for the development of strong roots, vibrant foliage, and bountiful yields.
As mentioned above, the introduction of compost into the soil improves its structure, promoting better root penetration and aeration. This means plants can more effectively absorb water and nutrients, leading to healthier, more vigorous growth. The microorganisms present in compost also contribute to a more dynamic soil ecosystem, helping to suppress plant diseases and pests naturally.
As a result, gardeners who incorporate compost into their soil management practices often observe a noticeable improvement in plant vitality and productivity, solidifying composting as an indispensable tool for anyone looking to cultivate a green thumb.
Setting Up Your Compost Bin
Setting up your compost bin is the first practical step towards transforming your kitchen scraps and yard waste into valuable compost. This section will guide you through selecting the right bin and preparing it for the composting process, ensuring you start off on the right foot.
Choosing the Right Location
Choosing the right location for your compost bin is crucial for effective composting. Ideally, place your bin in a spot that's easily accessible yet out of direct sunlight to prevent the compost from drying out too quickly.
A partially shaded area is perfect, as it ensures a balanced environment that's neither too hot nor too cold. The location should also have good drainage to avoid waterlogging, which can create anaerobic conditions and unpleasant odors.
Consider the proximity to your kitchen to make adding food scraps convenient, but also think about neighbors and avoid placing the bin too close to property lines. A well-chosen spot not only facilitates easier maintenance but also enhances the composting process, leading to faster decomposition and less effort on your part.
Essential Tools for Composting
Setting up a successful composting system doesn't require a lot of equipment, but a few essential supplies can make the process smoother and more efficient.
- A sturdy compost bin is the cornerstone of your setup, whether it's a simple DIY model, a convenient tumbler, or a specialized worm composter.
- To mix and aerate your compost, consider a compost turner or a garden fork, which will help speed up the decomposition process.
- A compost thermometer can be invaluable for monitoring the pile's temperature, ensuring it stays within the optimal range for microbial activity.
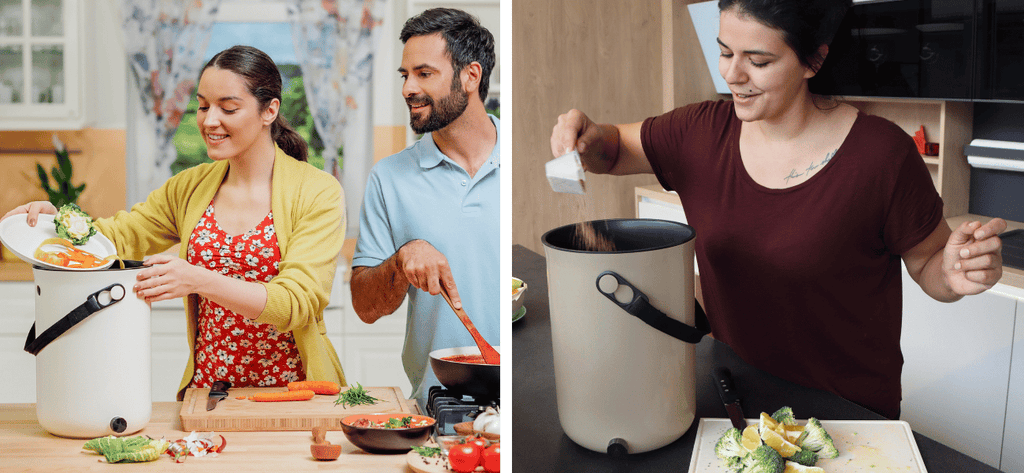
- Additionally, a kitchen compost pail is handy for collecting scraps indoors before transferring them to your outdoor bin.
- For those venturing into Bokashi composting, the Bokashi bin and bran are indispensable.
Remember, the right tools can significantly enhance your composting experience, leading to better soil and garden health.
Types of Compost Bins
When setting up your composting system, selecting the right type of compost bin can make all the difference.
DIY Compost Bins
DIY compost bins are a great choice for the hands-on gardener, offering flexibility in size and material to fit your specific needs.
Pros:
- Cost-Effective: Often made from recycled or readily available materials, making them cheaper than store-bought alternatives.
- Customizable: Can be built to fit specific sizes and shapes, accommodating any garden space or composting need.
Cons:
- Time and Effort: Requires a certain level of handiness and time to construct.
- Maintenance: May not be as durable as commercially available bins, potentially requiring more maintenance or replacements over time.
- Aesthetics: Depending on materials and construction skill, may not look as neat or tidy as prefabricated options.
Tumblers
Tumblers, on the other hand, are ideal for those looking for a more contained and faster composting process, as they allow for easy turning and aeration.
Pros:
- Fast Composting: Tumblers can produce compost more quickly than static bins due to improved aeration and easy mixing.
- Pest Prevention: Elevated and enclosed design helps deter rodents and pests from accessing the compost.
- Ease of Use: Easy to turn and mix compost materials, reducing the physical effort required.
Cons:
- Cost: Generally more expensive than DIY or static compost bins.
- Limited Capacity: Often have a smaller capacity than open, ground-based bins, making them less ideal for large gardens.
- Moisture Management: Can be challenging to maintain optimal moisture levels; may either dry out quickly or retain too much moisture without proper management.
Worm Composters
Worm composters, or vermicomposting systems, utilize red wiggler worms to break down food scraps into rich, nutrient-dense compost, perfect for indoor or small-space gardening.
Pros:
- Efficient Nutrient Recycling: Worms rapidly break down organic matter, producing high-quality, nutrient-rich compost (vermicompost).
- Suitable for Indoors: Can be used indoors without odors, making them ideal for apartments or homes without yard space.
- Low Maintenance: Requires minimal upkeep once established; worms self-regulate their population.
Cons:
- Temperature Sensitive: Worms are sensitive to extreme temperatures; systems must be kept in a controlled environment.
- Limited Input Materials: Not all compost materials are suitable for worm bins (e.g., citrus, onions, meat, and dairy products can harm worms).
- Initial Setup Cost: Purchasing worms and a suitable composting bin can be more expensive upfront compared to other composting methods.
Bokashi Bins
Bokashi bins provide a unique method of composting, using a special bran to ferment kitchen waste, including meat and dairy, which traditional composting systems can't handle.
Pros:
- Quick Process: Bokashi composting accelerates the breakdown of organic waste, producing pre-compost in just a few weeks.
- Versatile Waste: Can process a broader range of kitchen waste, including meat and dairy products, which are typically not recommended for traditional composting.
- Odor Control: The anaerobic process, along with the use of Bokashi bran, helps contain and neutralize odors effectively.
Cons:
- Secondary Composting Required: The output needs to be buried in soil or added to a traditional compost pile to complete the decomposition process.
- Ongoing Cost: Requires continuous purchase of Bokashi bran or similar activators to maintain the process.
Browse our options for Bokashi Kitchen Compost Bins.
Each type of compost bin has its advantages, catering to different composting styles, spaces, and preferences, ensuring there's a perfect match for every beginner gardener.
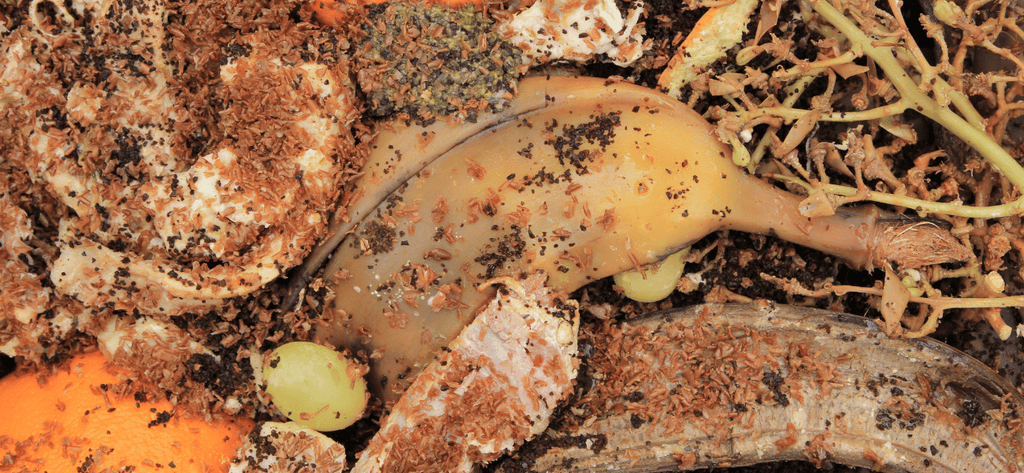
What to Compost
Knowing what to compost is crucial for a successful composting journey. It's important to differentiate between compostable materials and those that could potentially harm your compost pile, ensuring a healthy decomposition process.
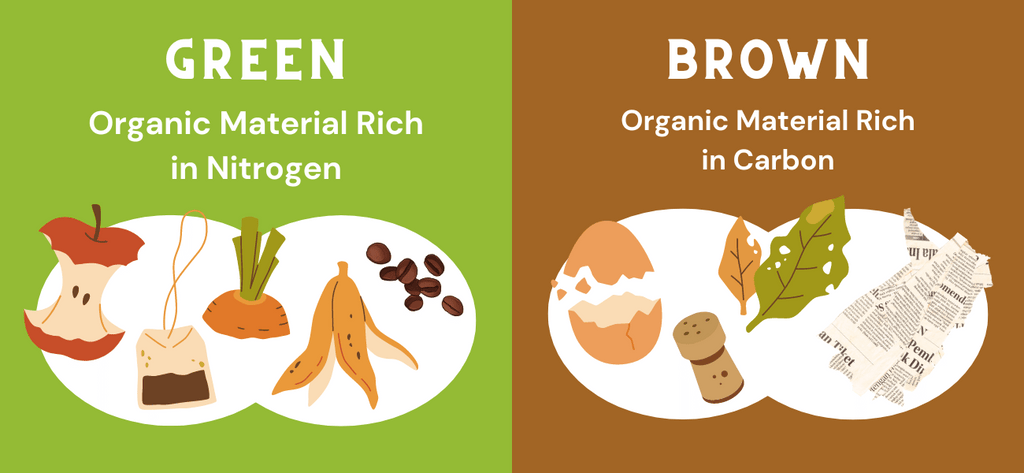
Green Waste: Nitrogen-Rich Materials
In composting, "green" waste refers to nitrogen-rich materials that are essential for accelerating the composting process.
Here are some key green waste items to include in your compost pile:
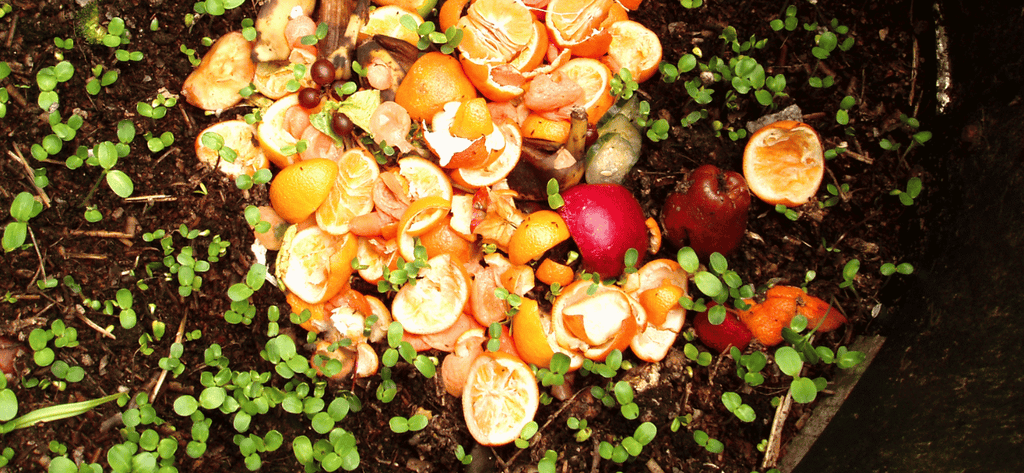
- Fruit and vegetable scraps (avoid citrus peels in large quantities as they can be too acidic)
- Coffee grounds and tea leaves (paper filters and tea bags are also compostable)
- Fresh grass clippings (use sparingly to avoid matting)
- Plant trimmings from your garden
- Annual weeds that haven't gone to seed
- Seaweed and kelp (rinse to remove salt before adding)
- Animal manures from herbivores (e.g., cows, rabbits, horses)
- Eggshells (crushed to speed up decomposition)
- Flowers and floral trimmings
These items are high in nitrogen, which serves as a critical nutrient that helps heat up the compost pile and breaks down the organic material more quickly.
Brown Waste: Carbon-Rich Materials
In the realm of composting, "brown" waste refers to carbon-rich materials that are vital for creating a balanced compost pile.
Here's a list of brown waste items to incorporate into your compost:
- Dry leaves, straw, and hay
- Shredded newspaper, cardboard, and paper (ink-free or soy-based inks are preferable)
- Sawdust and wood chips (from untreated wood)
- Dryer lint (from natural fibers like cotton or wool)
- Pine needles (in moderation, as they can acidify the compost)
- Corn stalks and husks
- Nut shells (except for walnut shells, which can be toxic to plants)
- Cotton and wool rags (cut into small pieces)
- Shredded brown paper bags
- Twigs and branches (chopped or shredded to speed up decomposition)
These materials provide the necessary carbon for your compost, helping to balance the nitrogen-rich green waste. This balance is crucial for maintaining a healthy decomposition process, minimizing odors, and producing high-quality compost.
Items to Avoid in Your Compost
When building your compost pile, it's just as important to know what not to include. Here are items to avoid in your compost:
- Meat, fish, and dairy products: Attract pests and cause odor.
- Diseased plants: Can spread disease to your garden.
- Pet wastes (dog or cat feces, cat litter): May contain pathogens harmful to humans.
- Invasive weeds or plants with persistent seeds: Might not be killed during the composting process.
- Treated wood products: Contain chemicals that can leach into your compost.
- Glossy or coated paper: Often contains inks and chemicals not suitable for composting.
- Coal ash or charcoal briquette ash: Contains harmful substances that can contaminate your compost.
- Non-biodegradable materials: Plastics, metals, or glass will not break down and can contaminate your soil.
- Personal hygiene products: Can contain chemicals and plastics.
- Oils, fats, and grease: Slow down the composting process and attract pests.
By avoiding these items, you ensure your compost remains healthy and beneficial for your garden, promoting a safe and effective composting process.
Items to Include in Bokashi Composting
Bokashi composting offers a unique advantage by allowing you to compost materials not typically suited for traditional composting methods.
Here's a list of items you can include in your Bokashi bin:
- Fruit and vegetable scraps: All parts, including peels and pits.
- Cooked foods: Including small amounts of leftovers.
- Meat and fish: Including bones, which are not suitable for traditional composting.
- Dairy products: Cheese, yogurt, and milk products.
- Bread and baked goods: Including cakes and pastries.
- Coffee grounds and filters: Tea bags are also acceptable.
- Eggshells: Crush them slightly to help with decomposition.
- Processed foods: In moderation, including cereals and cooked rice.
- Cut flowers: Once they've wilted and are no longer decorative.
While Bokashi composting can handle these items effectively, it's important to avoid liquids (like milk and juices), large bones that may take too long to break down, and plastics or metals which are not biodegradable.
How to Start Composting
Starting your composting journey is simpler than you might think, and it's a rewarding way to benefit your garden and the environment. Here are the initial steps to transform your kitchen scraps and yard waste into nutrient-rich compost.
Layering Your Compost
Layering is the foundation of successful composting, creating the perfect balance for decomposition.
- Begin with a bottom layer of coarse, brown materials like small branches or straw, which helps with aeration and drainage.
- Next, add a layer of green waste, such as kitchen scraps or grass clippings, rich in nitrogen to feed the composting microbes.
- Follow this with a layer of brown waste, like leaves or shredded paper, to add carbon.
- Continue alternating between green and brown layers, keeping the pile moist but not soggy.
This combination fuels the composting process, with green layers providing moisture and nitrogen, and brown layers offering aeration and structure. A balanced compost pile should have roughly equal parts of greens and browns by volume, ensuring efficient decomposition and minimizing odors.
This simple method kick-starts the transformation of waste into valuable compost for your garden.
Maintaining the Right Balance
Maintaining the right balance in your compost is crucial for effective decomposition and odor control. A healthy compost requires a proper mix of green (nitrogen-rich) and brown (carbon-rich) materials.
- Aim for a ratio of roughly 2:1, brown to green, to optimize microbial activity without creating a smelly mess.
- Regularly turning your compost helps aerate the pile, introducing oxygen necessary for microbes to thrive.
- If your compost is too wet or smells, add more brown materials to absorb excess moisture and reduce odor.
- Conversely, if decomposition seems slow or the pile is too dry, incorporate more green materials or a bit of water to reinvigorate the process.
Moisture and Aeration
Moisture and aeration are the lifelines of a thriving compost pile. For compost to decompose efficiently, it should be moist, but not soggy. The ideal moisture level is akin to a wrung-out sponge.
If the compost is too dry, microbial activity slows down, delaying decomposition. To remedy this, sprinkle water over your pile during dry periods to maintain the needed moisture.
Conversely, excessive moisture can create anaerobic conditions, leading to unpleasant odors. Aeration is the solution to this issue; turning your compost regularly introduces air, which helps regulate moisture levels and facilitates aerobic decomposition.
This process also distributes heat and microbes throughout the pile, ensuring all material breaks down evenly. Investing in a compost aerator or simply using a garden fork can make turning easier.
Remember, a well-aerated, properly moist compost pile is the secret to fast, odor-free decomposition.
Turning Your Compost
Turning your compost is a simple yet crucial step in the composting process. This reintroduces oxygen into the pile, preventing anaerobic conditions that can lead to foul odors and slow decomposition.
Ideally, you should turn your compost every few weeks. Use a garden fork or a compost turning tool to mix the materials well, bringing the outer edges of the pile to the center. This method also helps distribute heat and moisture evenly, ensuring that all parts of the pile are breaking down effectively.
Additionally, turning allows you to check the moisture level of your compost and add water if it feels too dry. Regular turning accelerates the composting process, leading to quicker production of rich, nutritious soil for your garden. By maintaining this routine, you create a healthier environment for the microorganisms that break down organic material, resulting in high-quality compost.
Bokashi Method
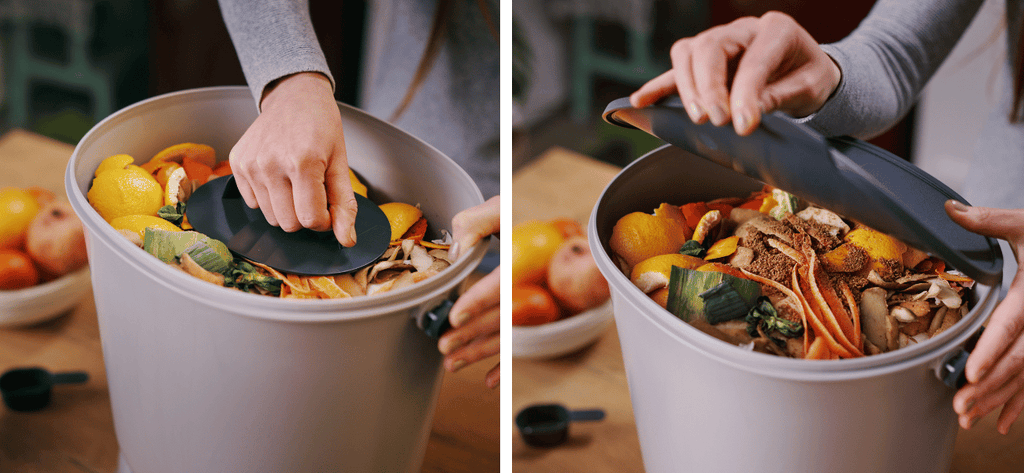
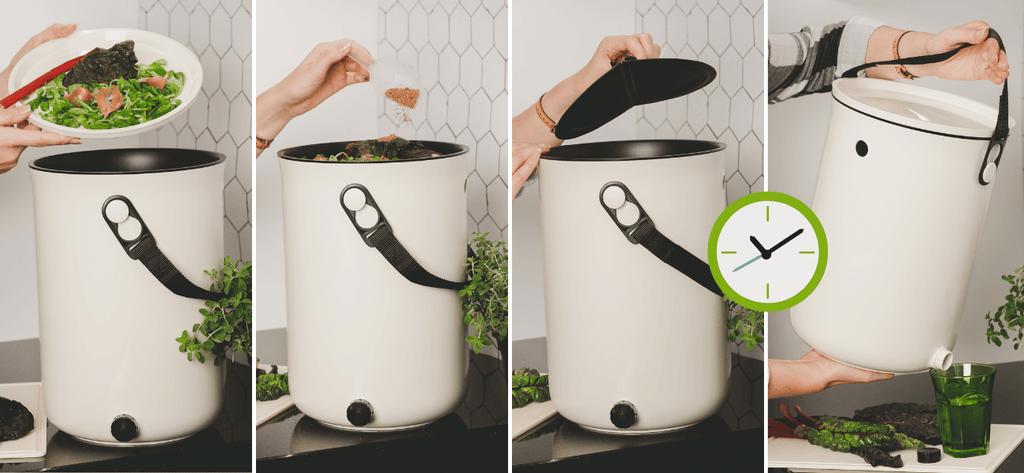
- Begin by layering your food scraps with bokashi bran in the bin, compacting them to remove air pockets.
- It's important to seal the bin tightly after each use to create an anaerobic environment necessary for fermentation.
- As you continue adding food waste, sprinkle a layer of bokashi bran on top to promote the fermentation process.
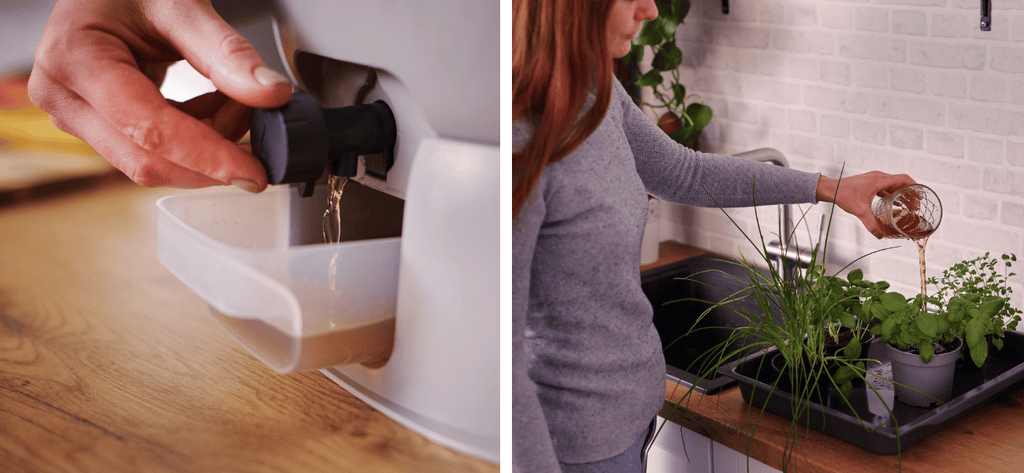
- Remember to drain any excess liquid that accumulates in the bottom of the bin periodically to prevent odor.
- Repeat this process until the bin is full, then let it sit for a couple of weeks to allow the fermentation to complete.
Once finished, you'll have nutrient-rich compost ready to be added to your garden or houseplants.
Troubleshooting Common Composting Problems
Composting might seem straightforward, but like any garden activity, it comes with its share of challenges. We'll guide you through common composting problems and offer practical solutions to keep your composting journey on track.
Bad Odors
If your compost pile starts smelling more like a landfill than a fertile garden bed, it’s a clear sign something’s amiss. Bad odors usually indicate an imbalance in your compost, often due to too much moisture or not enough air circulation. This condition creates a cozy environment for anaerobic bacteria—the kind that thrive without oxygen and produce a stench—to take over.
But don't worry, this is a fixable issue. First, try turning your compost more frequently to introduce oxygen and discourage those smelly bacteria. If the pile is too wet, add brown materials like dry leaves, straw, or shredded newspaper to absorb excess moisture and restore balance.
Remember, a healthy compost pile should have a pleasant, earthy smell. By keeping an eye on moisture levels and ensuring good airflow, you can maintain a sweet-smelling compost pile that’s a boon to your garden, not a nuisance.
Pests and Rodents
Dealing with pests and rodents can be a frustrating part of composting, but it's a problem that's entirely manageable with the right approach. Attracting unwanted guests often means your compost is too inviting, perhaps because of the inclusion of meat, dairy, or oily foods, which should be avoided.
To keep these critters at bay, ensure your compost bin has a secure lid and consider lining the bottom with wire mesh to deter burrowers. Regularly turning your compost also helps; it disturbs any would-be settlers and speeds up the composting process, leaving less time for pests to make a home.
Additionally, maintaining a good balance between green and brown materials prevents the compost from becoming too moist, a condition that pests love.
Compost Not Heating Up
When your compost isn't heating up, it's like a car that won't start—something's not quite right under the hood. A warm compost pile is a sign of decomposition at work, fueled by a balanced mix of greens (nitrogen-rich materials) and browns (carbon-rich materials).
If your pile feels more like a cold salad than a warm stew, it’s likely due to an imbalance in this mix. Too many browns, and the pile lacks the nitrogen needed to kickstart the microbial feast. Too many greens, and it could get too wet, suffocating the process.
The fix? Add more greens if it's too dry, or browns if it's too damp, and turn the pile to introduce oxygen and distribute heat. Remember, composting is a bit like cooking—a good recipe and a little patience can bring even the most sluggish compost pile back to life.
Slow Decomposition
Slow decomposition in your compost pile can test your patience, but it's usually a sign that your compost is lacking in one of the key ingredients for success. This issue often stems from a lack of nitrogen, poor aeration, or insufficient moisture.
Nitrogen-rich materials, or "greens" like vegetable scraps and coffee grounds, are essential for feeding the microorganisms that break down the compost. If your pile is heavy on "browns" like leaves and paper, adding more greens can speed things up. Also, turning your pile regularly introduces oxygen, vital for composting microbes to do their work efficiently.
Lastly, your compost needs to be moist, but not wet; think of the dampness of a wrung-out sponge. If it's too dry, water it lightly. By adjusting these elements, you'll provide the perfect conditions for rapid decomposition, turning your compost from sluggish to supercharged.
Using Your Compost
Now that you've mastered the art of turning kitchen scraps and yard waste into black gold, it's time to put that compost to good use. Whether you're enriching garden beds, revitalizing lawn areas, or making potting mixes, we'll show you how your compost can bring life and vitality to your garden.
Knowing When Your Compost Is Ready
Recognizing when your compost is ready to enrich your garden is key to unlocking its full potential. Mature compost looks and feels like dark, crumbly topsoil—a far cry from the scraps you started with.
It should have a pleasant, earthy smell, with no discernible pieces of kitchen or yard waste. If you see large pieces that haven’t broken down, it's a sign your compost needs more time.
The process can vary in length, typically taking anywhere from a few months to a year, depending on factors like the balance of materials, the size of the pile, and how often it's turned.
A simple test is to bag a small amount of compost and check for heat release. If it remains cool after a few days, it's likely ready to use. By waiting for compost to fully mature, you ensure it's packed with nutrients ready to support your garden’s growth.
Knowing When Your Bokashi Compost Is Ready
When your Bokashi compost is ready, you won’t find the typical earthy, crumbly material. Instead, look for slightly pickled, fermented waste that has a sour but not unpleasant smell—akin to pickles or sauerkraut.
This process usually takes about two weeks in the Bokashi bin. After this initial fermentation, the contents need to be buried in garden soil or added to a traditional compost pile to complete the breakdown process, which can take another two to four weeks.
The final sign that your Bokashi compost is garden-ready is when the material is no longer recognizable and has integrated into the soil, enriching it with beneficial microorganisms and nutrients. This method is particularly effective for handling meat and dairy products, which are not typically recommended for standard compost piles.
How to Use Compost in Your Garden
As a Soil Amendment:
To maximize the benefits of using compost as a soil amendment, integrate it into your garden beds at the start of each planting season. Aim for a mix of about 30% compost to 70% soil to avoid over-enrichment, which can harm plant roots.
For new beds, work the compost into the top 6 to 8 inches of soil, ensuring it's evenly distributed.
For established gardens, lightly rake compost over the soil surface, letting earthworms and natural processes incorporate it.
Testing your soil beforehand can guide how much compost to use, tailoring it to your garden's specific needs. This practice rejuvenates your soil, making it a robust foundation for healthy plant growth.
As Mulch:
Using compost as mulch is a savvy garden strategy.
- Spread a layer of 2 to 3 inches of compost around your plants, leaving a small gap around the stem base to prevent moisture buildup that can lead to rot.
- This layer will not only suppress weeds by blocking their light but also help retain soil moisture, reducing the need for frequent watering.
- As the compost gradually breaks down, it will continue to feed the soil, enriching it with organic matter and nutrients.
- Apply compost mulch in early spring to warm-season crops and in fall for overwintering plants.
This method promotes a healthier garden ecosystem and reduces the need for chemical fertilizers.
Making Compost Tea:
Making and using compost tea is a fantastic way to provide your plants with a liquid boost of nutrients.
- Start by steeping well-aged compost in water for 24 to 48 hours, stirring occasionally to aerate.
- Strain the mixture to remove solids.
- Use the tea immediately for the best results, applying it either as a foliar spray or directly to the soil around your plants.
This process enhances nutrient uptake and can help improve plant resilience against pests and diseases. For foliar applications, spray in the early morning or late afternoon to avoid direct sunlight and ensure better absorption.
Remember, a little goes a long way—dilute your tea with water if it's too strong to prevent nutrient burn.
Advanced Composting Tips
Once you've got the basics of composting down, it's time to elevate your game with some advanced techniques. From tweaking your compost recipe to optimizing decomposition rates, we'll share insights that can turn you into a composting connoisseur.
Composting in Small Spaces
Opt for a compact, sealed compost bin or a Bokashi system to keep things neat and odor-free. These containers can fit under sinks, on balconies, or in small backyards, making them perfect for apartment dwellers or those with limited outdoor space.
Regularly turning your compost and maintaining a balanced mix of greens and browns are key to avoiding smells and attracting pests. If outdoor space is at a premium, consider worm composting (vermicomposting) as an efficient, indoor-friendly option.
Worms work quickly, breaking down scraps into high-quality compost with minimal space and effort. By adapting your approach to fit your space, you can enjoy the benefits of composting, no matter the size of your garden.
Winter Composting
Winter composting can keep your composting efforts productive year-round, despite the chill.
To keep the decomposition process active, insulate your compost pile with a thick layer of straw or leaves to trap heat. Positioning your compost bin in a spot that gets plenty of winter sun can also help keep temperatures up. Consider using a black bin to absorb more heat and covering the top with a tarp to prevent the compost from becoming too wet from snow or rain.
Remember, microbial activity slows down in colder temperatures, so turning the pile might not be necessary as often. However, continue to add kitchen scraps and brown materials, balancing greens and browns as usual. By adopting these strategies, you can maintain an active compost pile that will be ready to nourish your garden when spring arrives.
Frequently Asked Questions (FAQs)
Can I compost meat and dairy products?
Composting meat and dairy products is generally not recommended for traditional backyard composting setups due to the risk of attracting pests and producing unpleasant odors. These materials can also be challenging to decompose properly without creating pathogens.
However, specialized composting methods like Bokashi can safely break down meat and dairy by fermenting these materials in a sealed container, making them an exception to the usual composting rules.
How long does it take for compost to be ready?
The timeline for compost to become ready can vary widely, typically ranging from a few months to a year or more.
Factors that influence this duration include the balance of green and brown materials, the size of the compost particles, environmental conditions, and how frequently the compost is turned. Hot composting methods can speed up the process, producing ready-to-use compost in as little as 2 to 3 months.
Bokashi composting works faster than traditional composting methods. The initial fermentation process in a Bokashi bin typically takes about two weeks. After this period, the contents should be buried in soil or placed in a traditional compost pile to finish breaking down. This additional breakdown process can take anywhere from two to four weeks. So, from start to finish, Bokashi compost can be garden-ready in roughly one to two months.
Conclusion
In wrapping up our journey through the essentials of composting, it’s clear that the benefits are vast—from enriching soil and reducing waste to promoting a healthier environment. Whether you're managing a sprawling garden or nurturing a collection of houseplants in a cozy apartment, composting is a remarkably effective way to give back to the earth.
We’ve covered the basics, tackled common problems, and explored advanced techniques, equipping you with everything you need to start.
So, why wait? Embrace composting as your next green endeavor. Not only will your garden thank you, but you’ll also be stepping into a more sustainable lifestyle, one compost bin at a time.